How To Use (Read Me First)
The Tag Libraries provide interactive documentation for this Tag Set that you can access
through Web browsers. Separate Tag Libraries have been set up for each of the specific Tag
Sets (Journal Archiving, Journal Publishing, and Article Authoring). Within each Tag
Library, you navigate to specific information in many ways, such as:
- alphabetical lists of element, attribute, and parameter entity names (the last of these is mainly useful to NISO JATS users who customize this Tag Set);
- special sections such as a Element Context Table, which lists what elements each element may occur within;
- narrative sections (typically inside the section Common Tagging Practice) that describe concepts that are complex or that involve many different XML element types, such as the section Tagging References (bibliographic citations);
- many links between related elements and discussions; and
- an index where you can look up concepts under a variety of names or descriptions, and reach the relevant parts of the document.
You can use the Tag Library as a reference to look up XML tags and how to use them, to
browse around and familiarize yourself with this Tag Set, to see examples of correct or
recommended usage, and even to find guidance for how to implement software to handle
documents that are marked up using this Tag Set.
At the top level of each Tag Set’s Tag Library (shown in the colored navigation bar
to your left) there are several main sections:
- How To Use (Read Me First)
- Root Element
- General Introduction
- Selecting a Model & Schema
- Elements
- Attributes
- Parameter Entities
- Document Hierarchy Diagrams
- Full Article Samples
- Common Tagging Practice
- Accessibility
- Modifying This Tag Set
- Version 1.1 Change Report
- Element Context Table
- Index
- Supporting Documentation Home
Moving Around in the Tag Library
As with most Web documents, you can click on links to travel from one topic to another
and use your browser’s “Back” button to backtrack through
previously-visited pages. In addition, there are three navigation aids on every page:
- At the top left is a horizontal Tab Bar with links to the primary topics
in the Tag Library (“Elements”, “Attributes”,
“Parameter Entities”, and “Index”) as well
as a link to the Tag Library’s main page (“Home”).
Clicking on a topic tab takes the user to the introduction for that section.

- To the left is a colored vertical Navigation Bar with links to all parts
of the Tag Library, including the Tag Library’s introduction, the
primary sections discussed earlier, and specialized sections such as those
on “Common Tagging Practice” and “Supporting
Documentation Home”.
- At the very bottom of each page, in the far right corner is a “Back to Top” link.
Navigation Bar
The vertical Navigation Bar is used to move within sections as well as between
sections.
- If a section has subsections, a triangle (
 ) appears next to the
section’s title.
) appears next to the
section’s title. - Clicking on the triangle changes it to a triangle pointing down
(
 ) and
opens a list of sub-topics within that main section.
) and
opens a list of sub-topics within that main section. - Clicking on a sub-topic goes directly to the corresponding discussion.
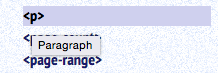
Elements: For example, clicking on the triangle
to the left of the word “Elements” will show a list of all the XML
element types such as <p> and
<table> that are defined in this
Tag Set.  (For those not
familiar with the tag name of an element, hovering over the tag name will reveal its
more English-like, descriptive equivalent, for example, hovering over the
“<p>” will show “Paragraph”
(For those not
familiar with the tag name of an element, hovering over the tag name will reveal its
more English-like, descriptive equivalent, for example, hovering over the
“<p>” will show “Paragraph”
 .) Because there are many
elements, you will likely have to scroll down to find a particular one (using the
scroll-bar immediately to the right of the Navigation Bar, not the main scroll-bar
for the entire browser window).
.) Because there are many
elements, you will likely have to scroll down to find a particular one (using the
scroll-bar immediately to the right of the Navigation Bar, not the main scroll-bar
for the entire browser window).
Clicking on the name of an element (in pointy brackets) will take you to a page
for that element, with detailed information about its use, content, and permissible
contexts.
Attributes: Similarly, clicking on the triangle
before the “Attributes” section will bring up a list of all the
available attributes. An
attribute that is available on many elements will list each element, and explain any
differences in usage. This section also provides key attribute details such as
whether the attribute is required or optional, and lists of suggested values.
An
attribute that is available on many elements will list each element, and explain any
differences in usage. This section also provides key attribute details such as
whether the attribute is required or optional, and lists of suggested values.
Tag Library Sections
In all Tag Library sections except the “Document Hierarchy Diagrams”,
when the text mentions a specific element, attribute, or parameter entity, the name is
linked to the page that describes that item. This makes it easy to access related
information.
The following Tag Library sections are generally useful; the remaining sections are
written for implementors and people modifying or installing the Tag Set.
Document Hierarchy Diagrams section illustrates
portions of the Tag Set’s structure that are nested or that have complex
structures. This information can also be gleaned on each Element page under the heading
“Description”. The diagrams use some special symbols that are
described below.
Common Tagging Practice section contains descriptions
of more general issues on how to use this Tag Set. For example, affiliations and
keywords involve numerous elements, attributes, and general design choices. These are
discussed in special sections, rather than under some particular related element(s).
These sections are important for learning to use this Tag Set well, and links to them
are provided from elements and attributes to which they are especially relevant.
Element Context Table has an alphabetical list of
available elements. For each one, it shows all the elements that can directly contain
it. This is a great way to find out whether a certain element can be used in a certain
context. This information can also be gleaned on each Element page under the heading
“This element may be contained in”.
Index section works like the index at the back of
many books. You can use it to find where a given item or topic is discussed. The index
lists elements, attributes, and discussion topics under many related names and
descriptions, so if you don’t know the exact tag name to use for something, try
looking in the index under various related words, and you will most likely find a
reference to the applicable tag or attribute.
The Element Page
These pages start out with the XML name of the element they describe, followed by
a more English-like, descriptive name and a definition. Many elements also have
remarks that give further details, discussions of best practice, notes that may be
helpful to users that need to convert data into this Tag Set from other sources, and
cross-references.
There is also a description of exactly what elements are allowed within the
element and in what combinations. This information is provided in three forms:
- “Content Model” — the “raw” content model in XML syntax. This may contain parameters entities, of the form “%name;”, which often stand in for commonly-used lists of elements. Users not familiar with formal XML (DTD) syntax will likely prefer the “Expanded Content Model” or the “Description”.
- “Expanded Content Model” — the content model with all parameter entities expanded to their ultimate values. This list directly shows all the elements that the described element can contain, and in what combination.
- “Description” — a text description of the allowable content, which is much longer than the content models, but should be readily understandable without having to learn the details of content models and their punctuation. These descriptions often refer to categories of elements, such as “the address elements”. These categories correspond to parameter entities that are shown in the “raw” content model, and are reused in many places.
For many elements, a “Document Hierarchy Diagram” provides a fourth
descriptive form. This form is described below.
Most element pages include specific examples that show how the element can be
used, including any relevant context. These examples have all been tested and
validated; however, portions are often left out or replaced by “...”
to keep examples manageable. In addition, the most relevant parts of examples are
highlighted so they are easy to find.
For more details see the Introduction
to Elements section.
The Attribute Page
Attribute pages are organized very much like element pages. However, because an
attribute cannot have sub-elements, the description instead tells which elements can
use the attribute, what kind of attribute it is, and what the permitted and default
values are (the default value is used when the attribute is not specified at all on
a particular instance of an element).
Some common kinds of attributes are:
An XML identifier (ID) | This kind of attribute must have a value that is an XML NAME,
which can consist of XML name characters (alphabetical characters,
digits, period, underscore, and hyphen), and cannot start with a
digit. Every ID attribute value in a single document
must be unique and provides a way to link or refer to its element
(for example, using the <xref> element). ID attributes are
generally named @id. |
|---|---|
An identifier (IDREF) | This kind of attribute must have a value that is the same as some
ID value in the same document. IDREFs
appear on elements (such as <xref>) that refer to other elements.
IDREF attributes are generally named @rid. Some @rid attributes are of type
IDREFS, which is simply a space-separated list of
IDREF values. |
Text, numbers, or special characters (CDATA) | These attributes can take any string value at all. If the
attribute value is surrounded by single quotes, then single quotes
cannot appear inside; if the attribute value is surrounded by double
quotes, then double quotes cannot appear inside. In either case, the
prohibited character can instead be represented by an XML character
reference such as “'”. XML elements cannot
be placed within attribute values. |
“xxx-type” attributes | There are many attributes whose names end in
“-type”. They are generally
CDATA attributes as described above. They are
typically assigned tokens as values, containing no spaces. Typically
if there are spaces in the value, they separate multiple independent
tokens, all of which apply. For example, some element might be both
of type “important” and
“normative”, and be given type
“important normative”. In many
cases, the Tag Library gives suggested values for such attributes.
Unless specifically stated otherwise, those values are not the only
values permitted. |
Finally, there may be a “Restrictions” section that specifies if
the attribute must always be specified or is optional.
For more details see the Introduction
to Attributes section.
The Document Hierarchy Diagrams
These diagrams illustrate portions of the hierarchical (nested) structure of this
Tag Set. Each diagram has one element “root” and may illustrate the
structures of several additional elements. For each element illustrated, its name
appears in a box on the left, with lines to boxes for each of its possible
child-elements, which are in a column on the right.
Boxes for child elements can have names and/or symbols within. If the box has
merely “...”, it means that the actual content has been omitted, to
save space or improve clarity. If it has merely an icon of a page with lines, it
stands for text content rather than an actual element.
If a box has an element name, then symbols at the left end of the box indicate
whether that element is required and/or repeatable. These symbols are called
“occurrence indicators”:
?
| means that the item is optional (zero or one) |
|---|---|
*
| means that the item may occur any number of times (zero or
more) |
+
| means that the item must occur at least once, but may occur any number
of times (one or more) |
a thick vertical bar on the left of the box | means that the item is the “document element”: the
top-most element, such as <article> or
<book> and is therefore required. |
(no symbol) | means that the item must occur exactly once |
The symbols at the right end of a box have these meanings:
˜ (a tilde) | means that the item may take one or more attributes |
|---|---|
a thick vertical bar on the right of the box | means that the item is expanded elsewhere (For example, if an element
is permitted in multiple places within a certain parent element, there
is little point in repeating its information many times.) |
The lines that connect a box to boxes on its right may either be squared-off or
direct (angled) lines. The former indicates that the boxes to the right must occur
in the order shown; the latter indicates that any order is permitted.
For more details and examples see the Document
Hierarchy Diagrams section.